How to Simulate a TCP/UDP Client Using Netcat
In this guide, we’ll introduce the client-server model and show you how to simulate a TCP/UDP client using a useful tool called Netcat – so you can establish connection using your computer’s own terminal.
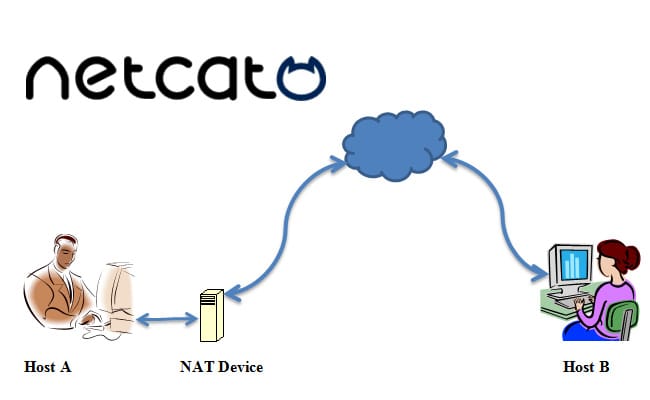
So,how does the client-server model work within the Internet of things? The client is the device that initiates communication. The server is Ubidots (or any other server connection), which will accept connections and manage data transfers over a simple protocol like TCP or UDP.
To learn more about managing your data with Ubidots, find out how to send data to Ubidots over TCP or UDP.
What is Netcat?
Netcat is a featured networking utility that reads and writes data across network connections, using the TCP/IP protocol. Designed as a reliable “back-end” tool, Netcat can be used directly with other programs and scripts to send files from a client to a server and back. At the same time, it’s a feature-rich network debugging and exploration tool that can specify network parameters while also establishing a connection to a remote host via a tunnel.
Although Netcat can do many things, its main purpose and most desirable functions are to:
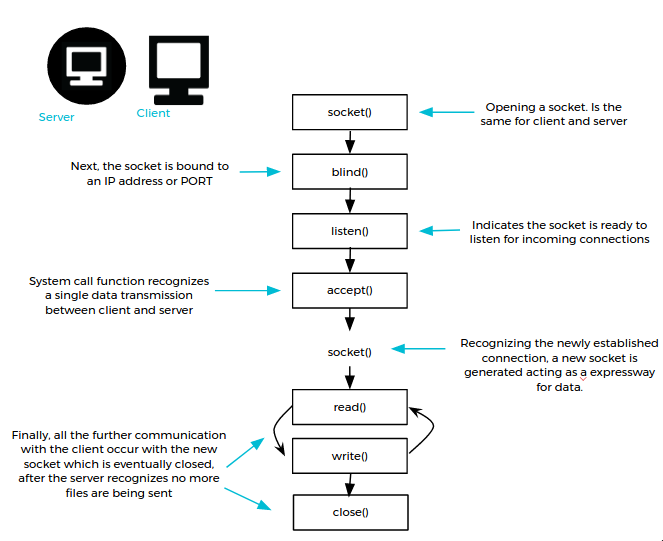
1.Create an initial socket to establish a connection from the server to the client.
2.Once connected, Netcat will automatically generate a second socket to transmit files from the server to the client and vice versa. (This is the really cool part).
A diagram of Netcat’s data protocol architecture is shown below:
As you’ll see below, this simple solution is also extraordinarily powerful and flexible. We’ll use local connections for the sake of simplicity, though of course, they can also be used between different machines.
Syntax
nc [-options] hostname port[s] [ports]
nc -l -p port [-options] [hostname] [port]
Basic parameters
- -l: set the “listen” mode, waits for the incoming connections.
- -p: local port.
- -u: set the UDP mode.
Test your Netcat understanding as a client-server
Open two computer terminals – the first will act as the server and the second as the client.
TCP client
With Netcat, your PC can be converted into a server. You’ll want to begin as a server that listens at port 2399:
$ nc -l 2399
We can also use the server to connect to the recently opened port (2399) from the client side:
$ nc localhost 2399
As you can see in the image below, the connection is established:

With the connection established, you can now write to the server from the client:
$ nc localhost 2399 Hello Server
In the terminal where the server is running, your text files will appear seamlessly.
$ nc -l 2399 Hello Server

UDP client
By default,Netcat uses the TCP protocol to communicate – but it can also use UDP with the -u option.
As we mentioned above, Netcat lets you convert your PC into a server. Here, we’re going to establish the connection between the server and the client using UDP.
On the server side, run the command below. As you can see, you only need to add -u to the command to establish the UDP connection:
$ nc -u -l 2399
Once you start the server, establish the connection with the client:
$ nc -u localhost 2399
Now the client and server are using UDP to communicate. You can verify communication using the netstat command in a new (3rd) computer terminal.
$ netstat | grep 2399
udp 0 0 localhost:2399 localhost:57508 ESTABLISHED
As you can see below, the message is received by the server and the transmission is verified by the connection:

With this introduction to Netcat, you now have a better understanding of how to use this advanced tool for sending data quickly and efficiently between client and server. Check out the Netcat project homepage for further information.
Happy Hacking! 🙂
