A Safer Home With an Easy-To-Build Motion Detection System
We prioritize our safety and try to reduce the risks as much as possible, a reality highlighted by the fact that the home security market is estimated to be valued at around USD 56.9 billion.
Few things are as universal and important as feeling safe at your home. Any disturbance to this feeling can be enough to have a negative impact on your entire life. That’s why, regardless of how real the threats are, we prioritize our safety and try to reduce the risks as much as possible, a reality highlighted by the fact that the home security market is estimated to be valued at around USD 56.9 billion.
An important contributor to the growth of this market has been the emergence of IoT, which, coupled with the higher availability of reliable connectivity technologies, has given homeowners the chance to get all kinds of devices that record video, alarm users, or lock doors, among other benefits.
And even though these devices are affordable and very user-friendly (resulting in easy installations and usage) we’re makers here at Ubidots, which is why our first instinct is usually to look for the parts and build the devices we need with our own hands.
That was the case of Leonardo, one of our Customer Success engineers, who recently faced a situation in which the safety of his house and family was potentially at risk.
To make a long story short, some suspicious-looking individuals were seen multiple times wandering in his neighborhood, and even though nothing had happened yet, there was a consensus in the community about how uncomfortable they felt.
In the case of Leonardo, this situation was even more stressful because he travels with his family on most weekends, leaving the home empty and giving these individuals (or others) an ideal opportunity to trespass.
With all of this in mind, it was time to get to work… After assessing all the tools and resources he already had at his disposal, Leonardo decided to make a motion detection system that takes a picture every time it’s triggered, since, out of all the other options, this one was the most effective for his problem.
The system he envisioned had the advantages of being both subtle as well as extremely efficient, since he wouldn’t have to monitor the images constantly (given that it would alert him of every new picture/motion) and he could always call the police whenever the system photographed something he thought was problematic, regardless of his location.
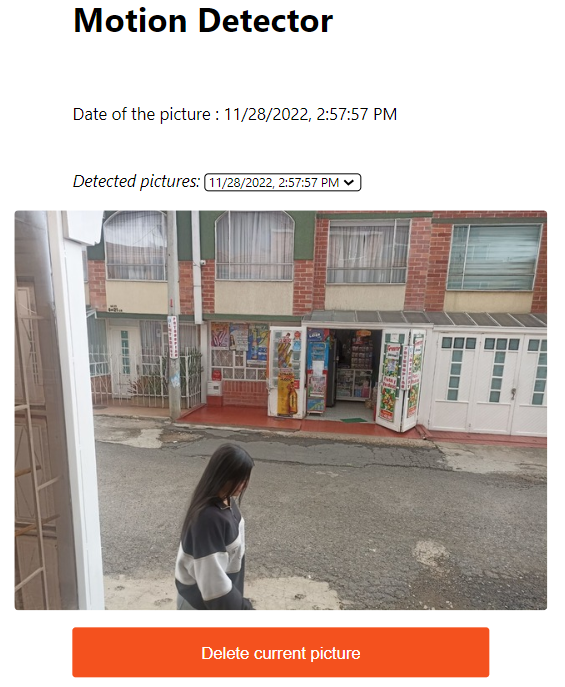
The system works by using a passive infrared sensor that, upon registering a motion, triggers an ESP32-CAM to take a picture. The image is then sent to Google Drive and its FileID, FolderID, and FileName are then sent to Ubidots where the pictures can be visualized in a dashboard. Ubidots also generates the alerts Leonardo gets on his phone every time a picture is taken, making it easy to keep up with any novelty.
Building the Motion Detection System, Step by Step
Hardware Used in the Project
- PIR motion sensor (1)
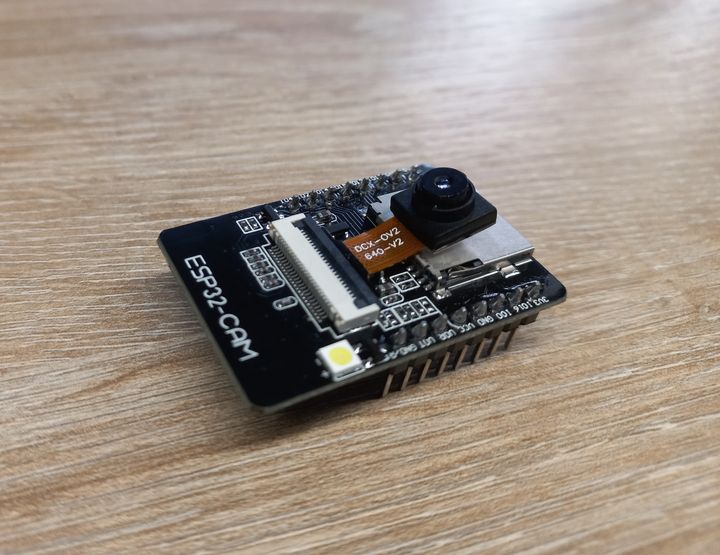
- M5Stack ESP32 Camera module development board (1)
- SparkFun FTDI basic breakout - 3.3V (1)
- Jumper wires (1)
Software/Cloud Tools Used in the Project
- An Ubidots active account
- Arduino IDE
- Google Script
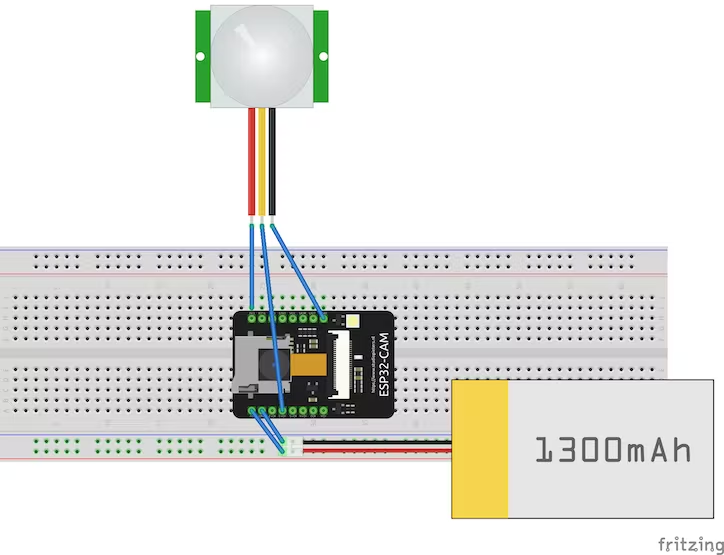
1. Wire the PIR Motion Sensor to the ESP32-CAM
With the help of some jumper wires, connect the PIR motion sensor to the ESP32-CAM following the schematic shown in the image below. Note that you can change the pinout inside the code.
2. Programming the Google Script project.
To create a new Google Script project, follow these steps:
- Go to the Google Apps Script website.
- Click on the top-left “+ New project” button and create a new project.
- Copy the code found in this repository and paste it into your Google Script project.
- Put the token of your Ubidots account in the variable called "TOKEN". This way, the system will send the fileID, folderID, and fileName inside the context of the dot in string format. Typically, the context is used to store strings in key-value pairs.
const TOKEN = "YOUR-TOKEN";You can change the variable label and device label as desired. In such devices and variables, you'll store the fileID, folderID, and fileName of the picture taken by the ESP32-CAM.
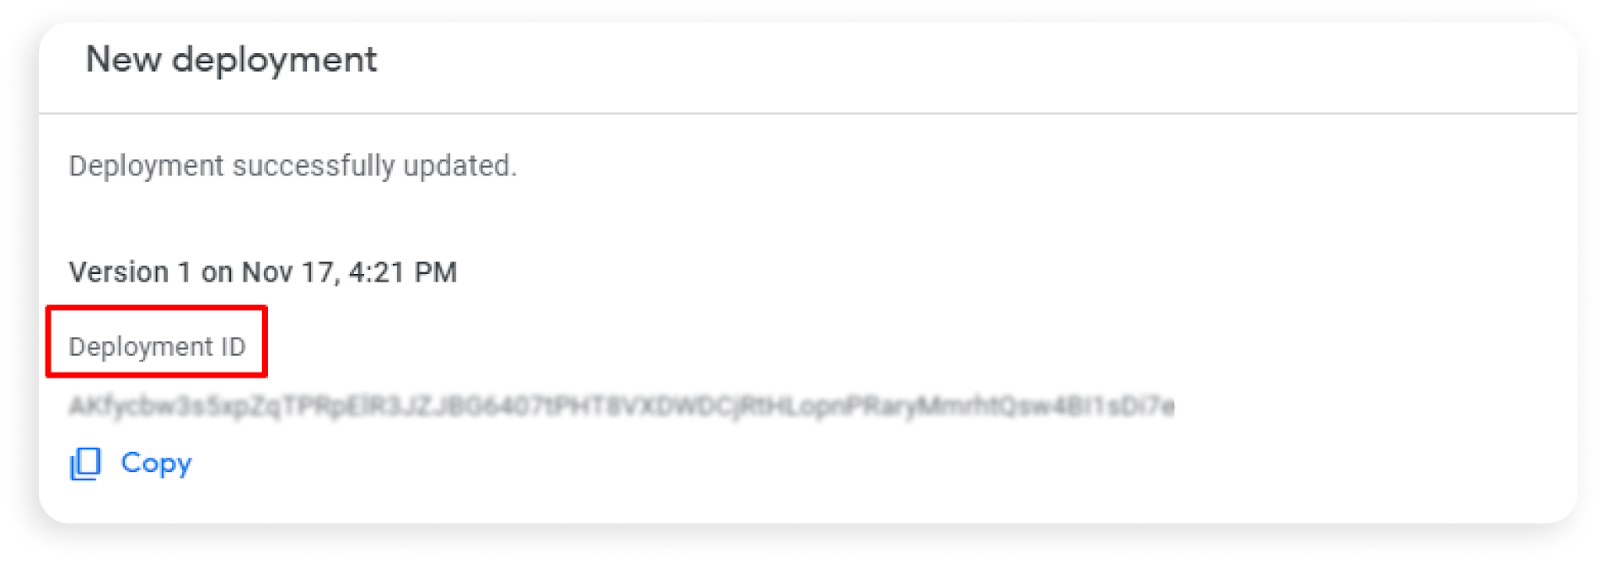
- Deploy your code and change the permissions of the script to allow everyone to see it.

- Copy the ID that appears under “Deployment ID” once you publish the script. We'll use it inside the ESP32-CAM.
3. Programming Your ESP32-CAM.
There are many tutorials on the Internet on how to program the ESP32-CAM, for example, this one. Download the respective code from this repository and open it in your Arduino IDE.
However, some changes must be made to the code for it to run properly on your ESP32-CAM.
- Put your wireless network credentials in the SSID and Password fields.
const char* ssid = "YOUR-SSID";
const char* password = "YOUR-PASSWORD";
- Paste the ID of your Google Script in the following variable.
String myScript = "/macros/s/YOUR-URL-ID/exec"; //Replace only "YOUR-URL-ID"Finally, run all the code in your Arduino IDE and flash your ESP32-CAM.
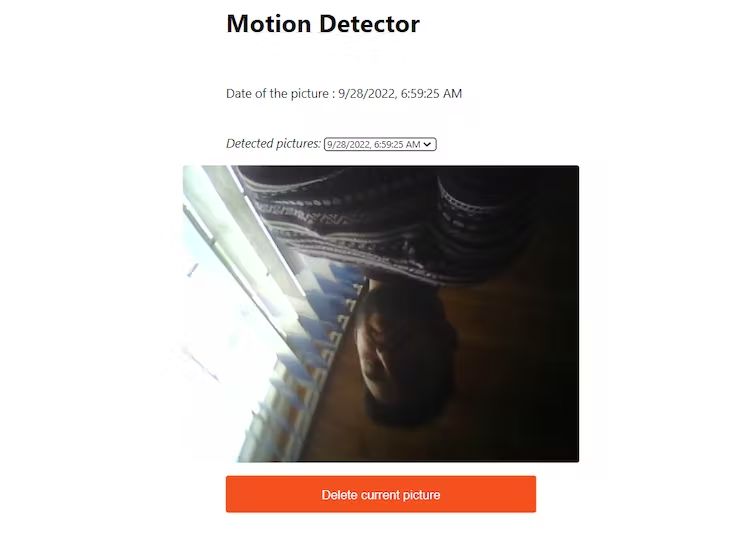
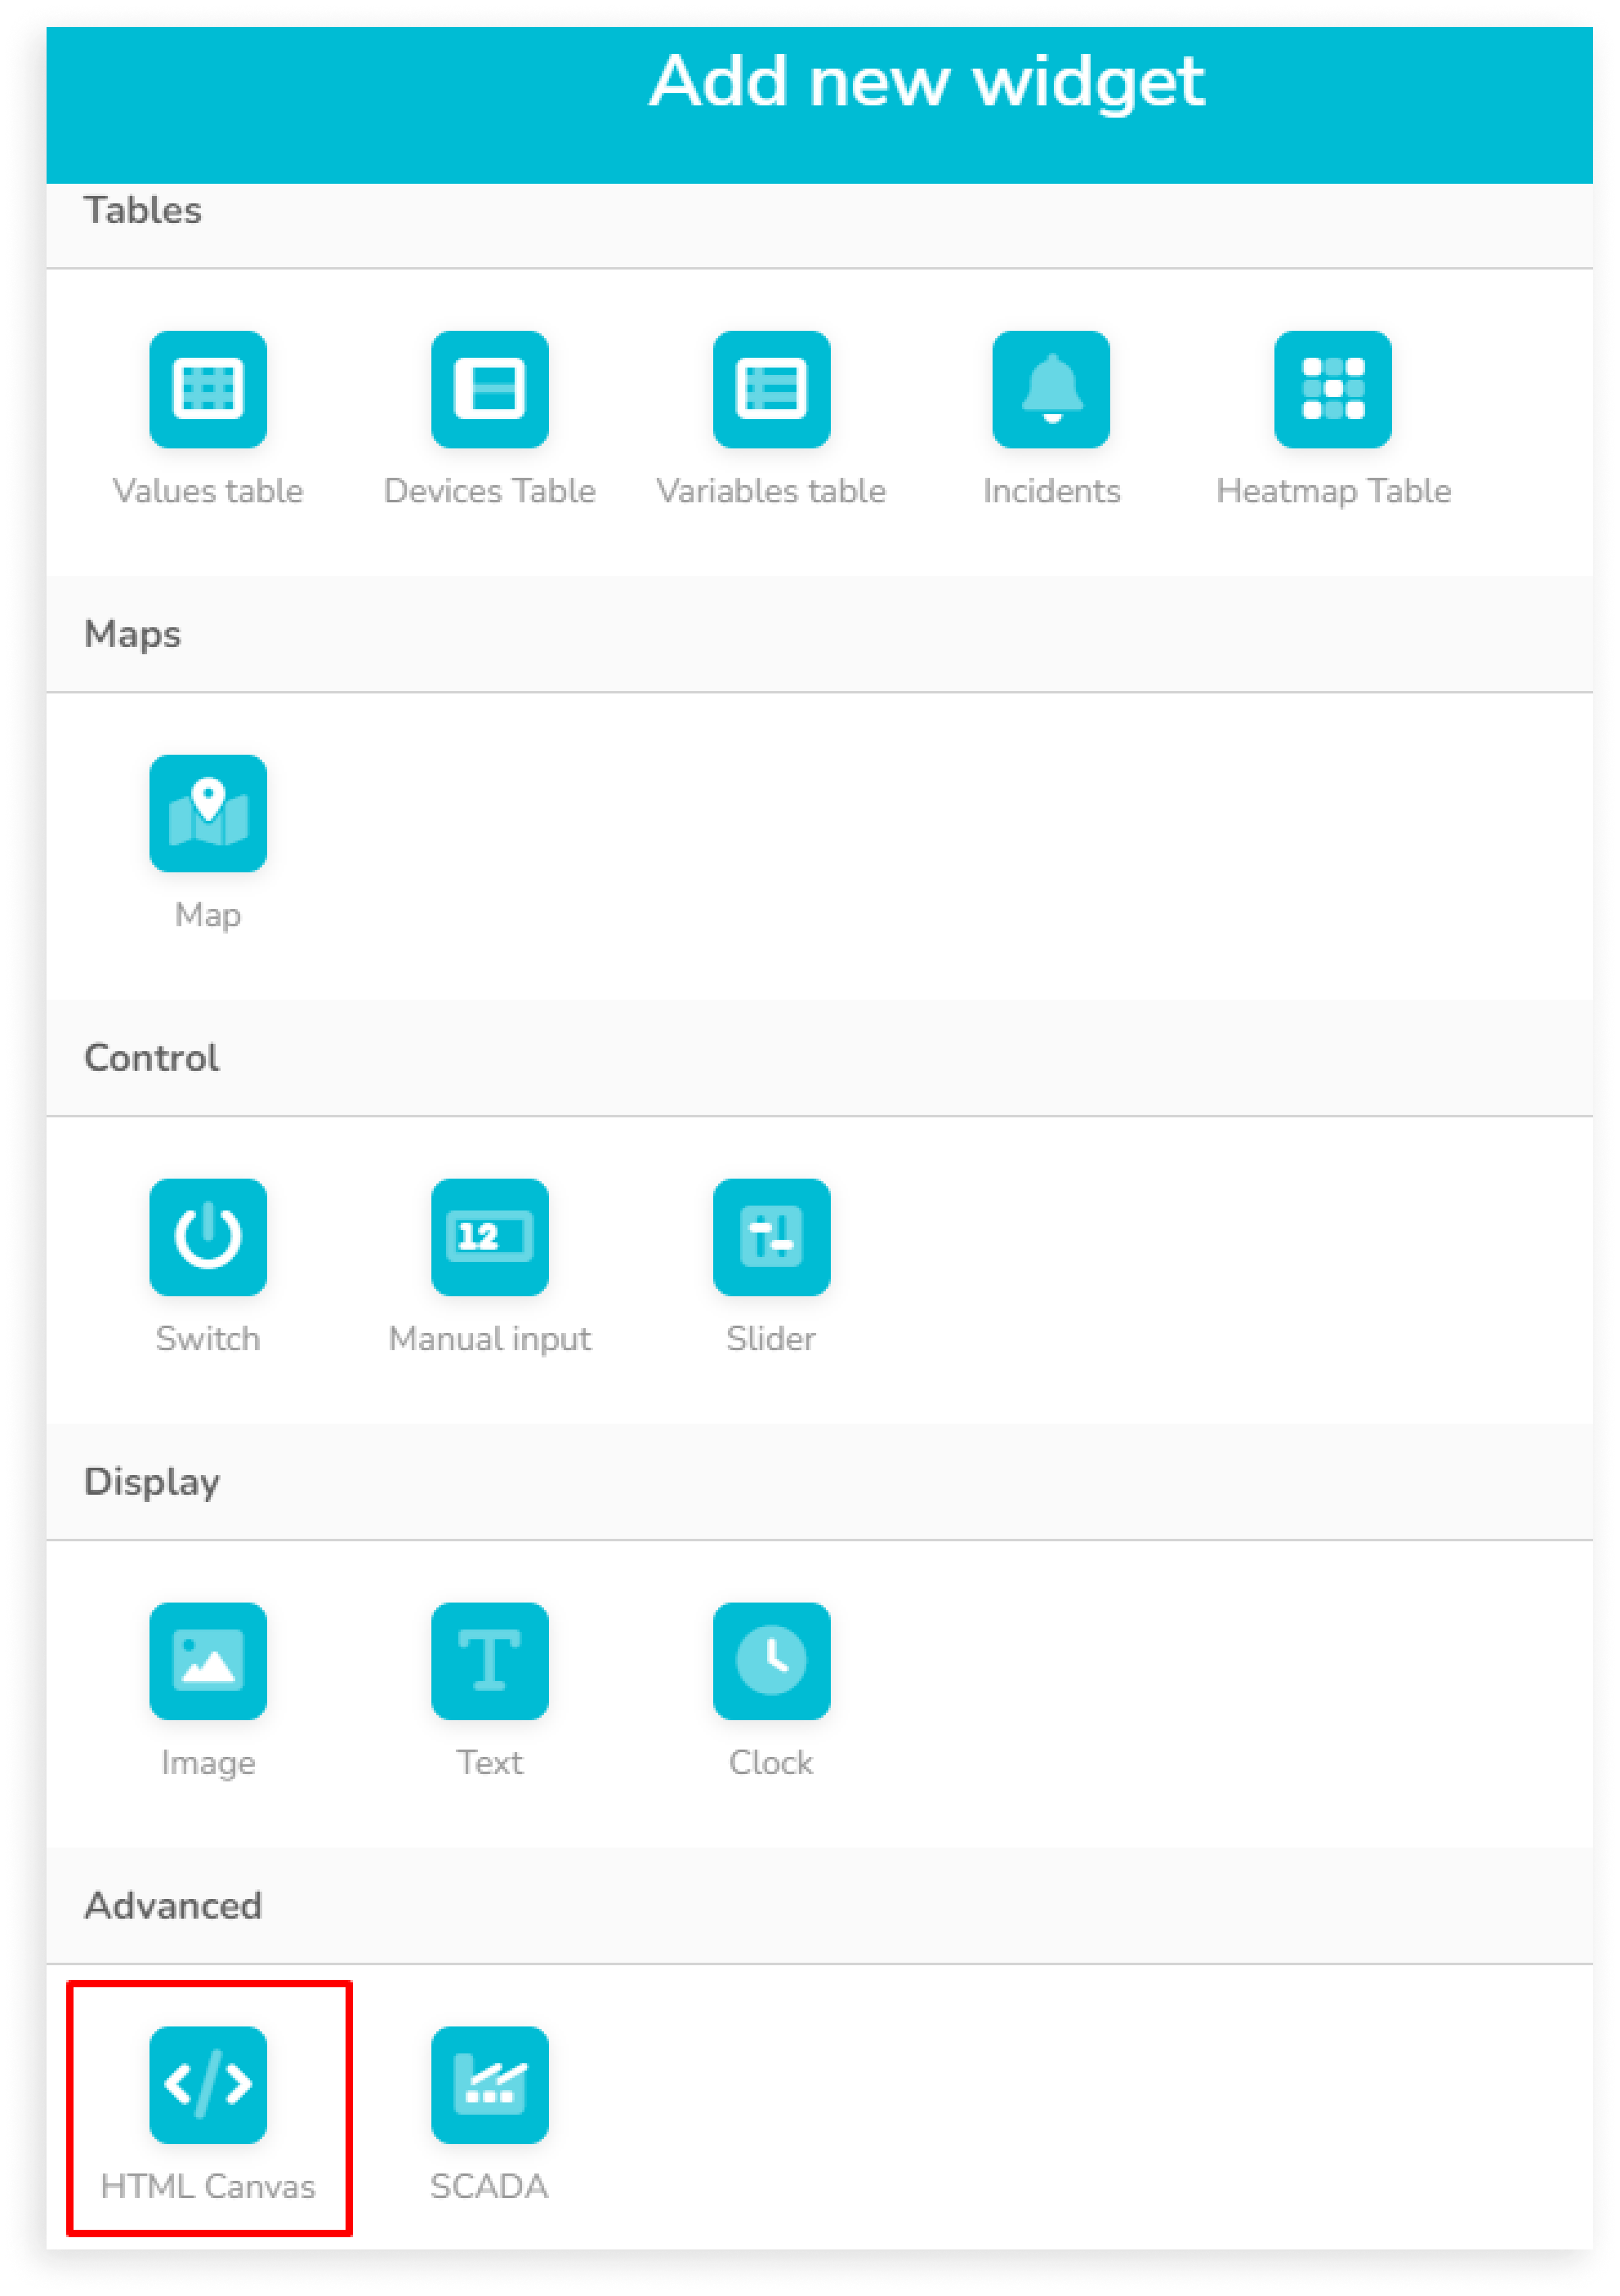
4. Customize Your Ubidots Widget
The HTML canvas widget allows you to make your own custom widget. Click here to learn more. With the widget created in the following steps, you'll be able to see the pictures taken by the ESP32-CAM. In addition, you'll see a dropdown with some registers of the pictures which, if you prefer, can be removed.
Now, let’s create our own widget using these code snippets:
- Go to the Ubidots "Data" dropdown menu in the navigation bar, then "Dashboards", and finally select the dashboard you'll be working on.
- Click on the top-right “+” button in your dashboard.
- Select the “HTML Canvas” option.
- Copy the HTML, CSS, and JavaScript codes and paste them into the code editor of the widget.
- In the JavaScript code, put the token of your Ubidots account in the variable called "TOKEN".
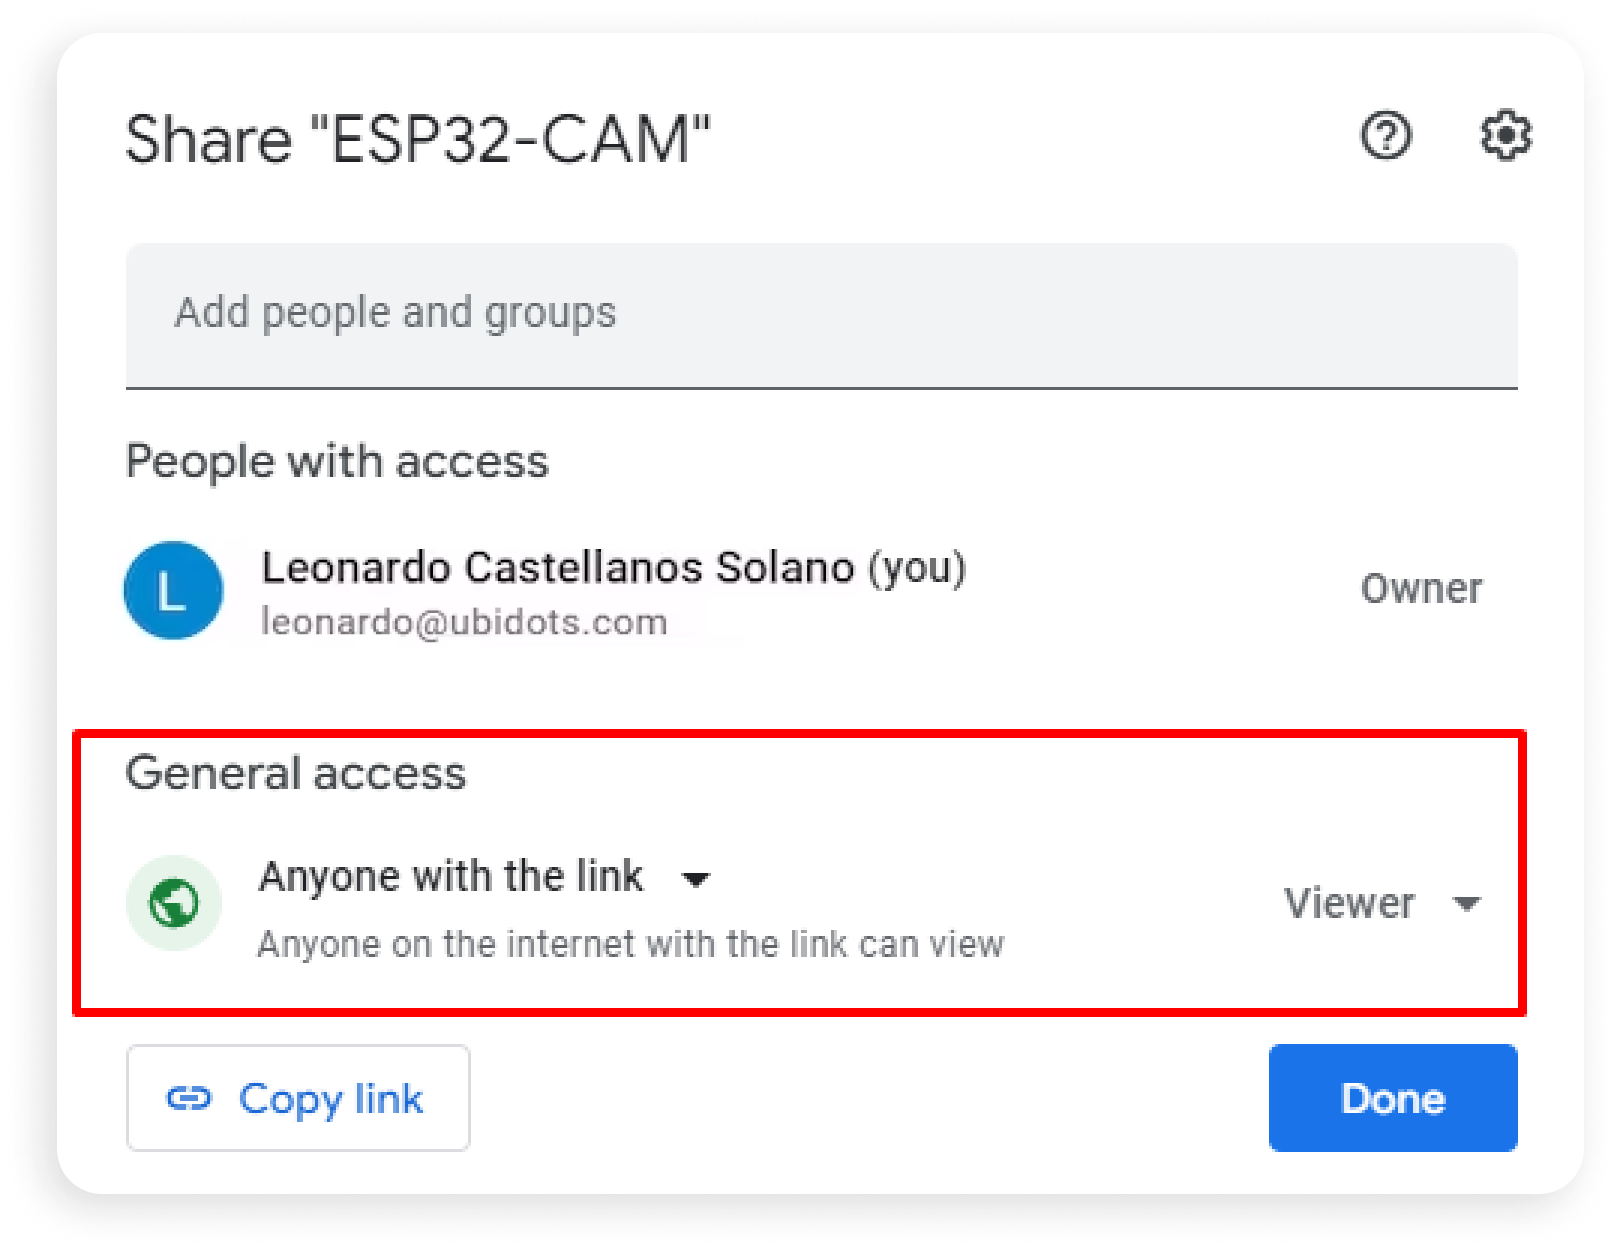
var TOKEN = 'YOUR-TOKEN';- Verify the permissions in the Google Drive folder that contains all the pictures. You have to allow access to “anyone with the link”.
Important note: You must confirm that the device and variable labels set in the Google Script project match with the device and variable labels set in the JavaScript code.
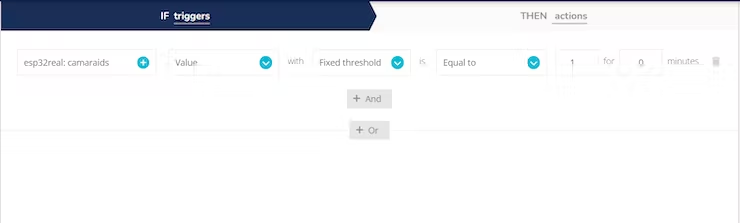
5. Set Up an Alert
Ubidots events allow you to trigger email, SMS, voice call and even webhook notifications based on your sensor data. In this case, we’ll use the events to receive emails with the pictures captured by the ESP32-CAM. Please follow these steps.
- Go to the "Data" dropdown in the navigation bar, then "Events".
- Click on the top-right “+” button and create a new event.
- Set your event to be triggered once the variable receives "1".
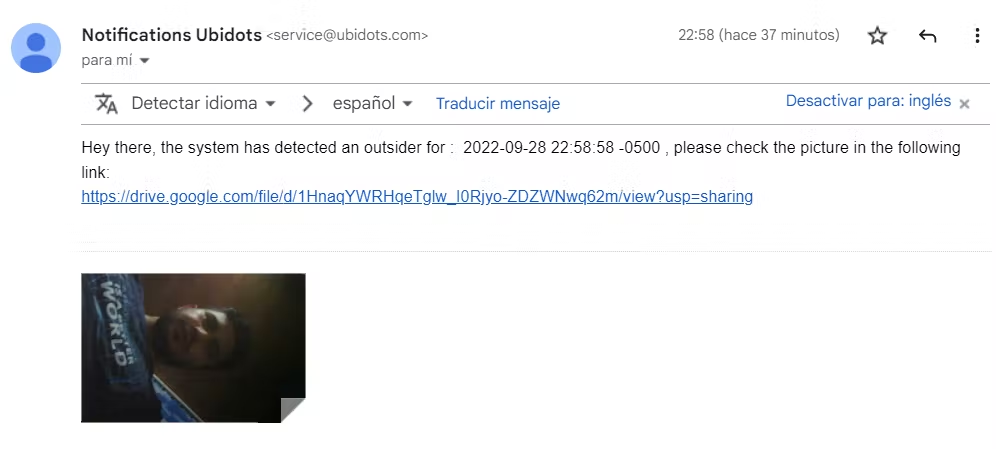
- Please note that Ubidots allows you to use custom fields inside event actions. For example, we’ll include the URL to the image file, which is stored in the context of the data point. To access the context, use this notation:
Hey there, the system has detected an outsider at: {{variable.last_value_timestamp}}, please check the picture in the following link: https://drive.google.com/file/d/{{variable.last_value_context.fileID}}/view?usp=sharing
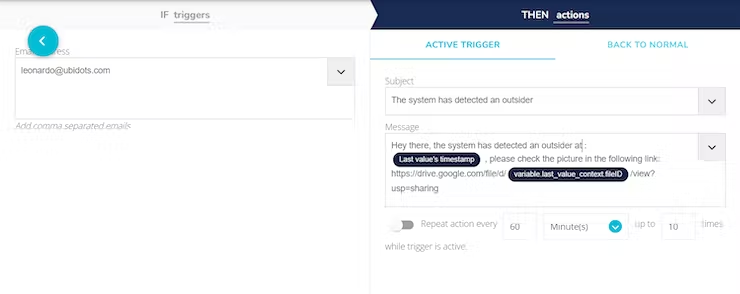
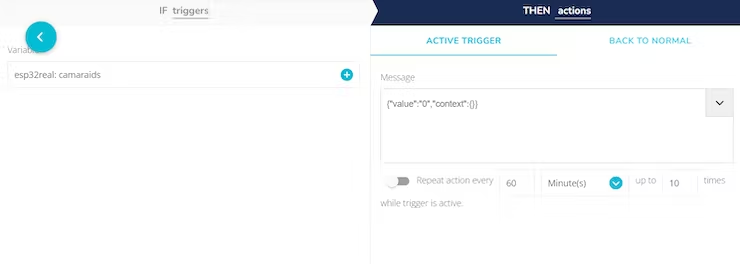
In "THEN actions" set a zero in the variable to reset the event trigger.
And just like that, you can, as Leonardo, build a simple but effective IoT system that improves the security of your home and brings peace of mind to your life.